This topic walks through the steps required to create a quote from scratch. This includes adding a contact, adding products, and delivering the quote using QuoteValet.
For a guided overview of how to create a quote please see the Creating a Quote video.
For an interactive demo of how to create a quote click here.
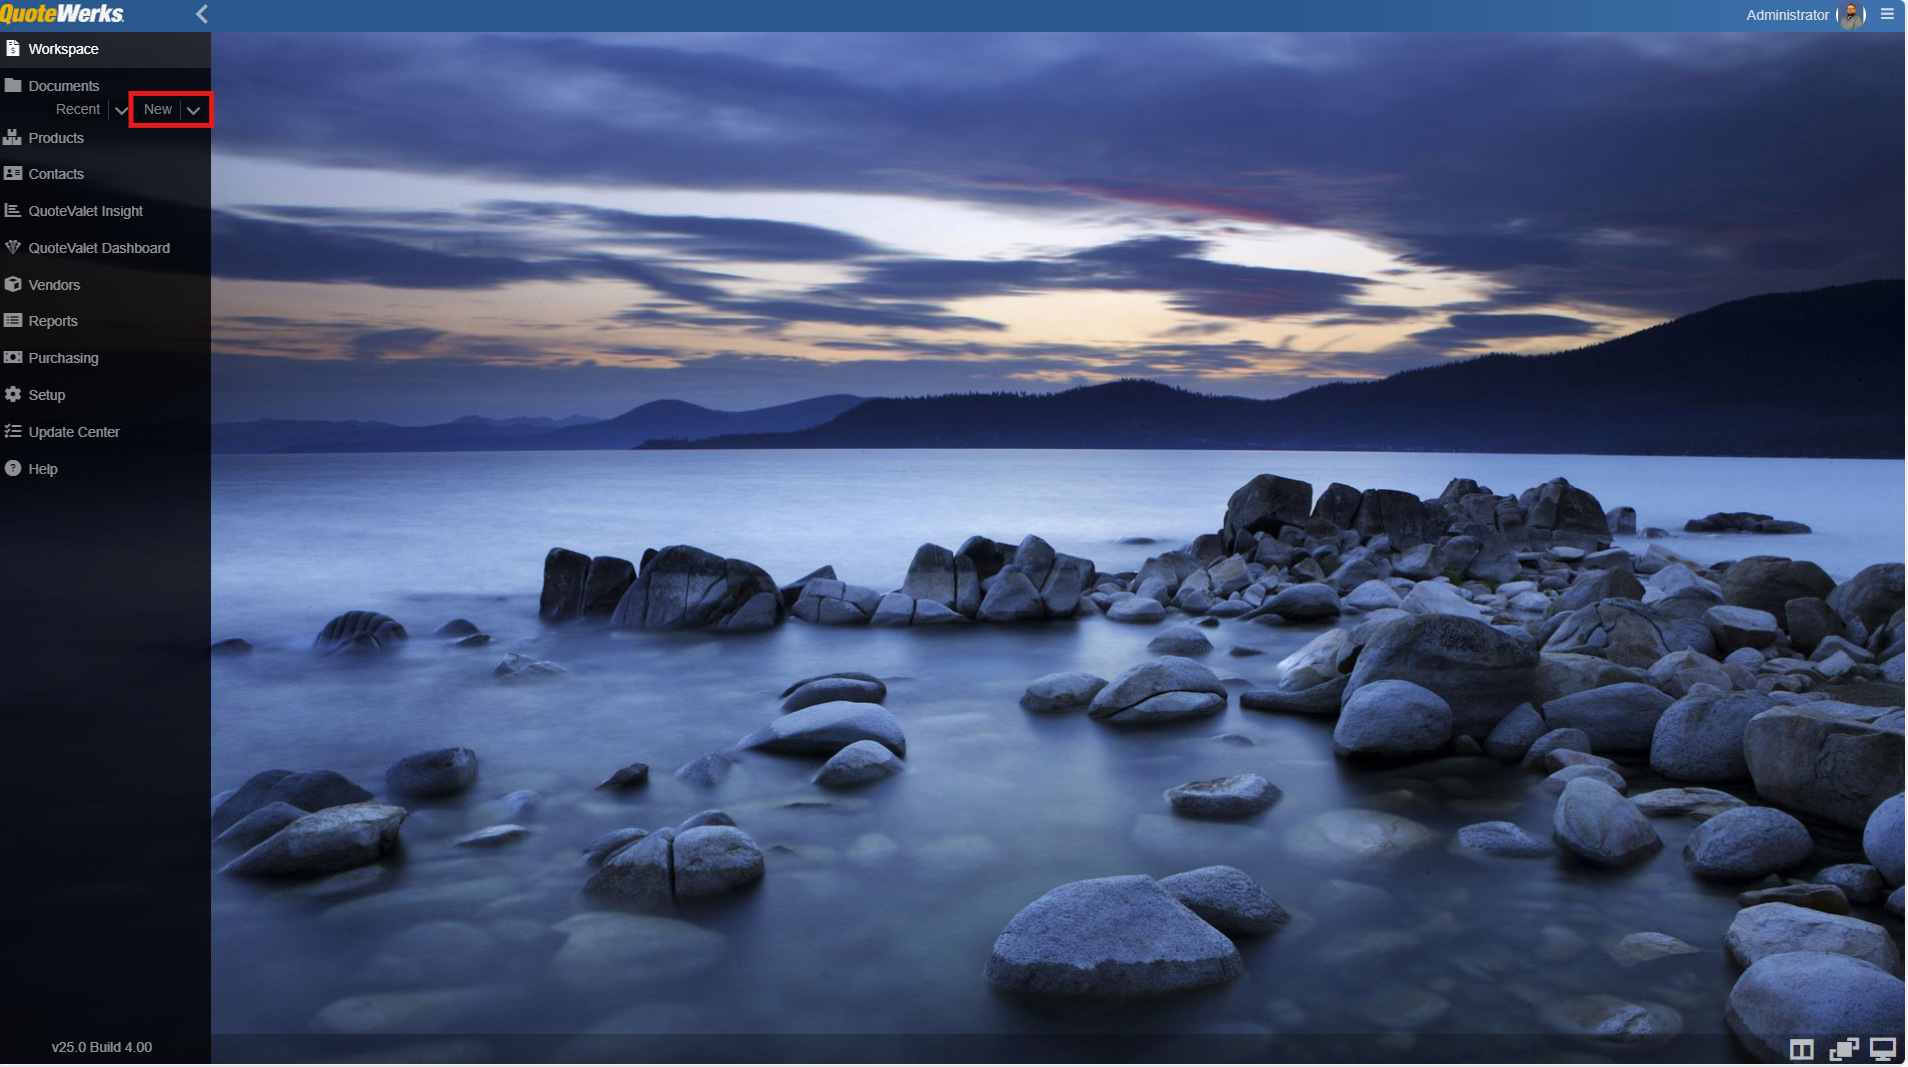
1. Click on the new button under the documents heading on the left navigation panel.
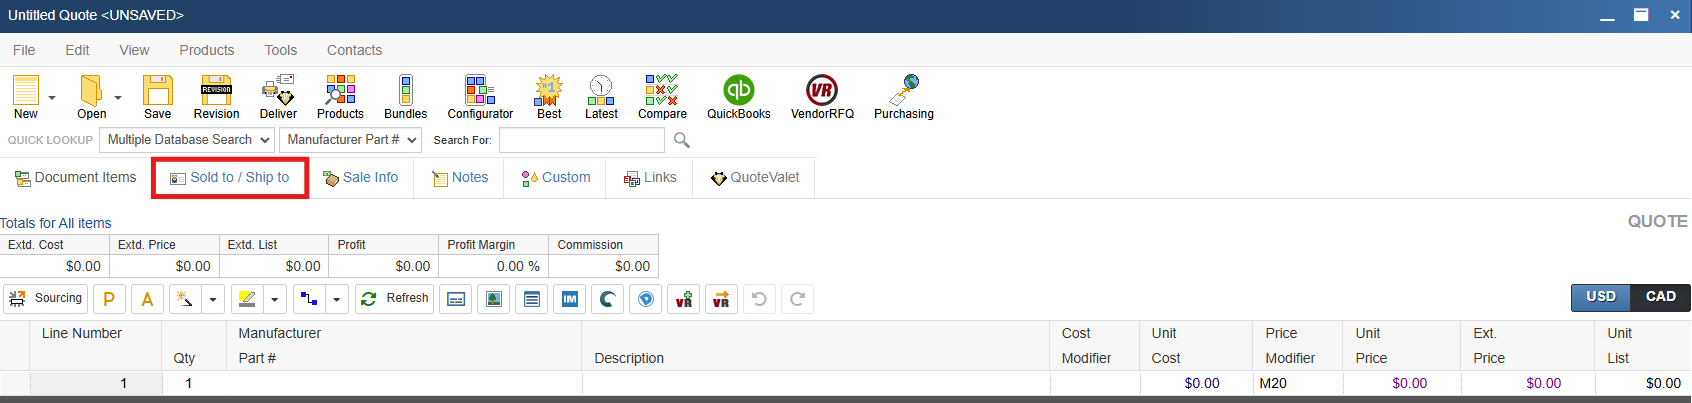
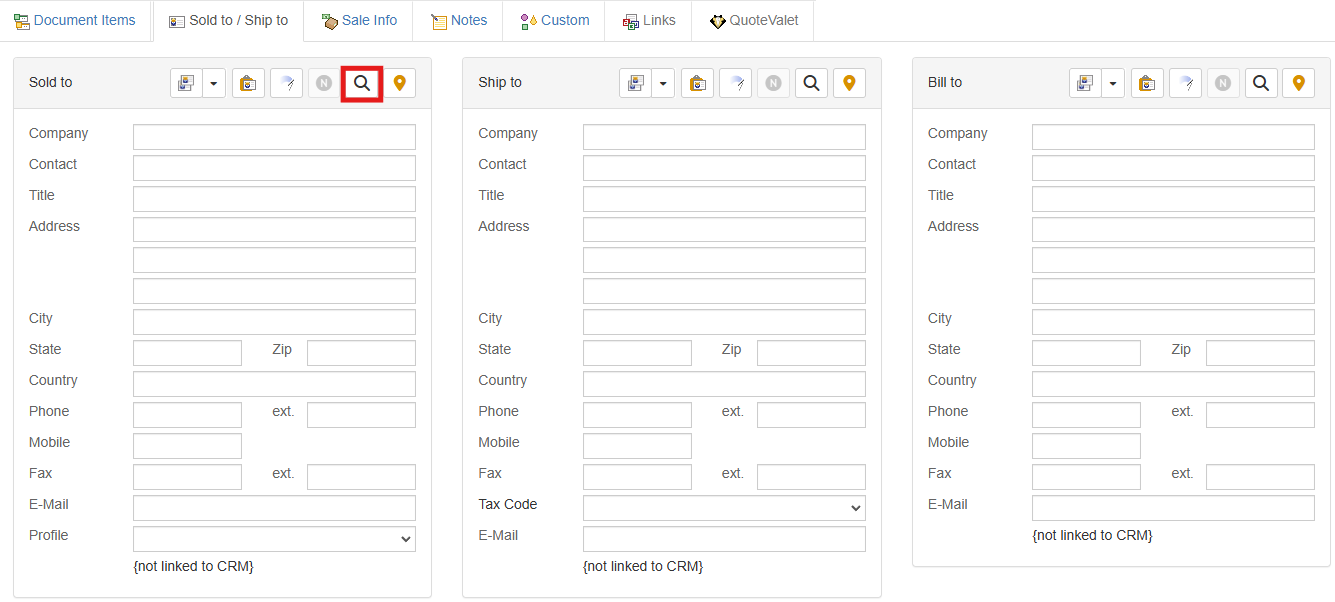
2. This opens the document workbook for the quote that we are going to create. To begin, we can add a contact to the quote and this is done by clicking on the sold to ship to tab.
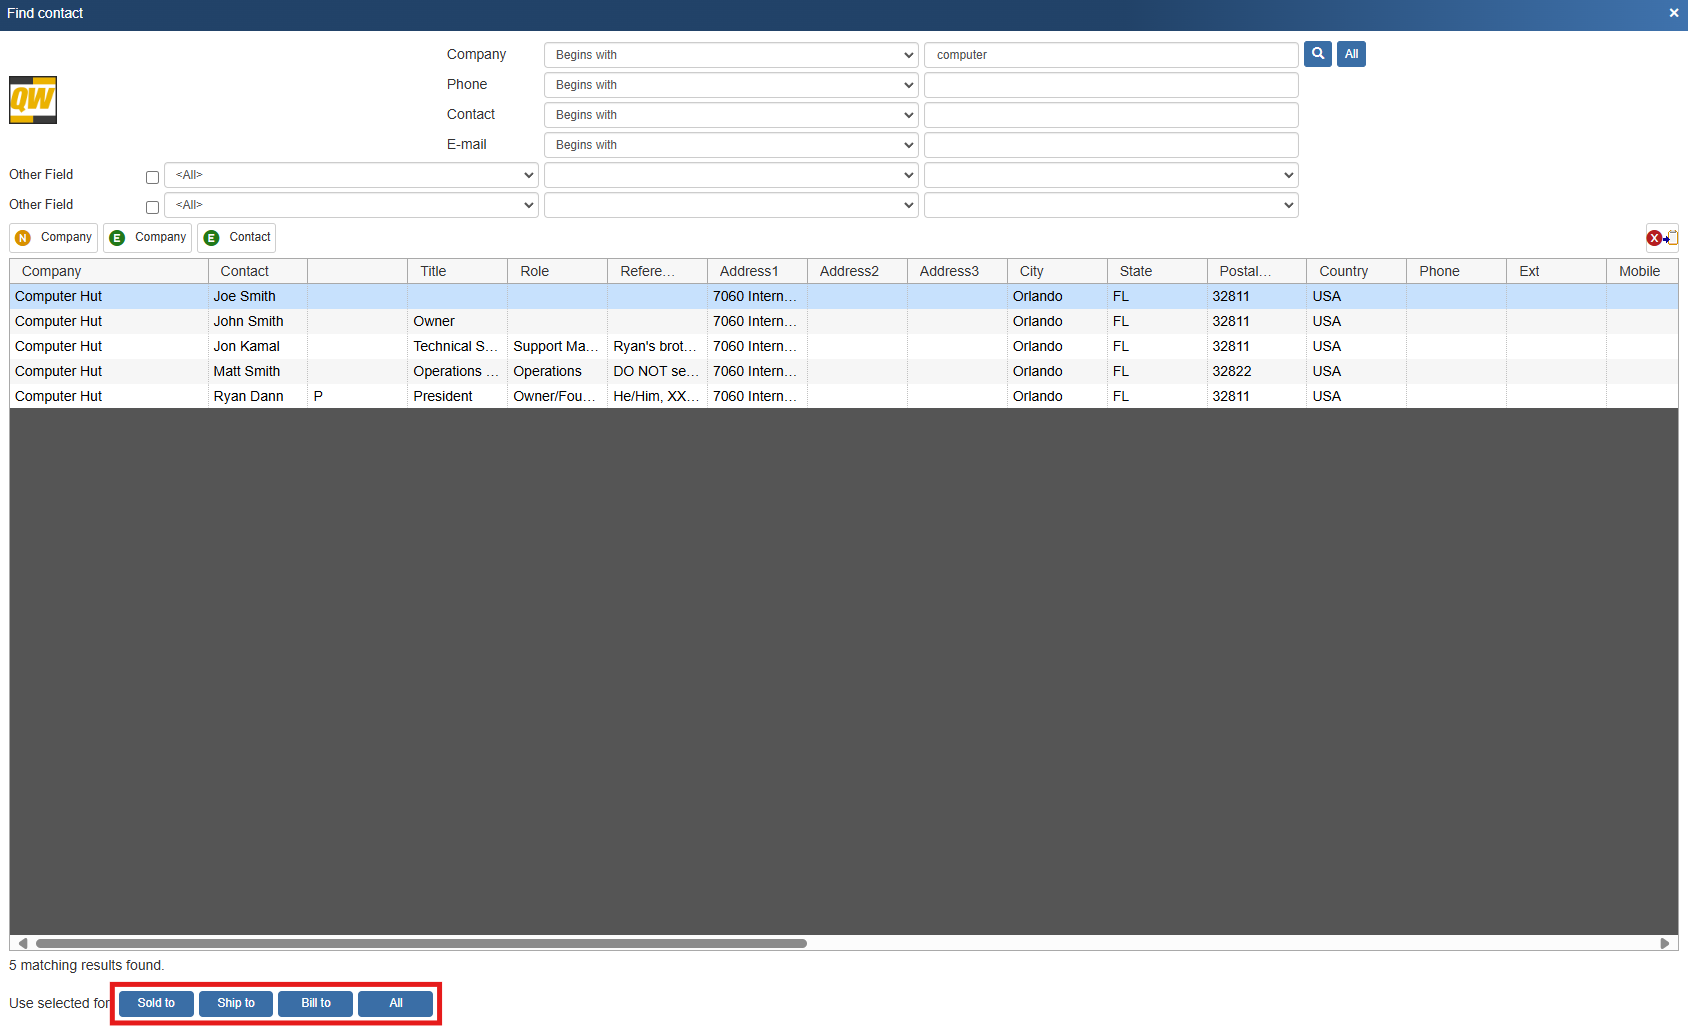
3. Once in the sold to ship to tab, click on the magnifying glass to search for a contact. This opens the find contact window. This searches your CRM, PSA, or the native QuoteWerks contact database depending on how you have things set up.
4. Search for the contact you wish to use and either double click or select them and hit the sold to, ship to, bill to or all button on the bottom of the window.
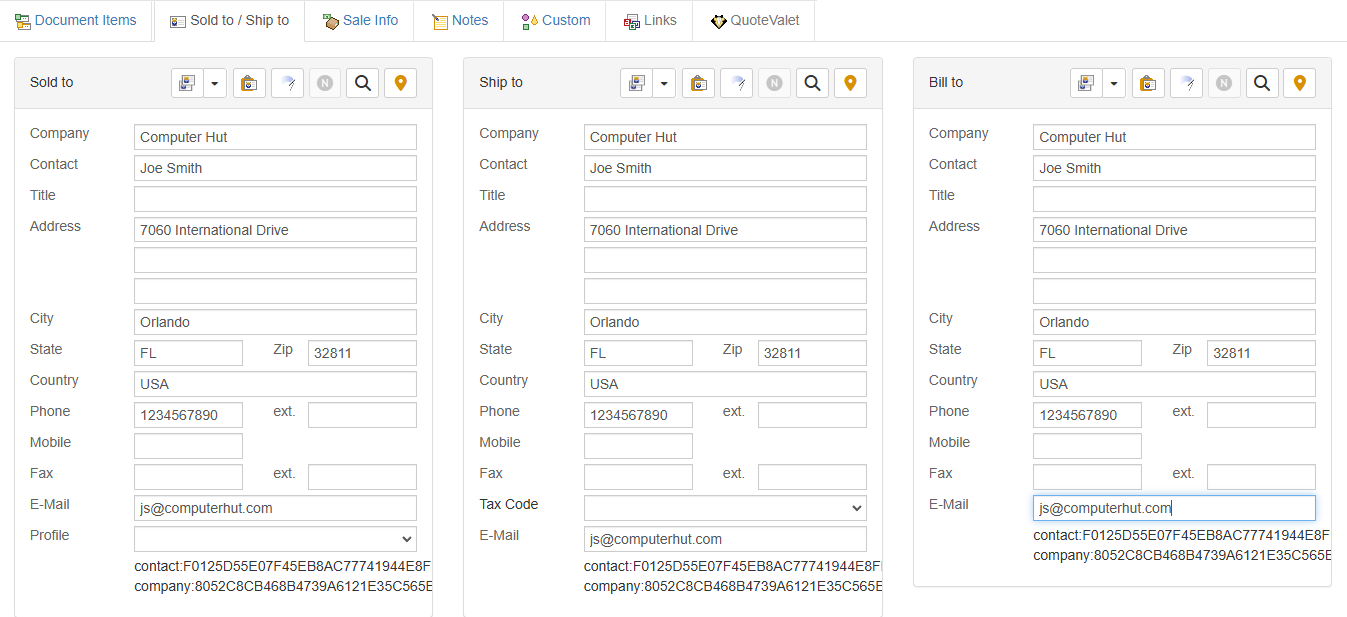
5. When we close out of the find contact window, we can see that our contact has been added to all sections of the sold to/ship to tab.
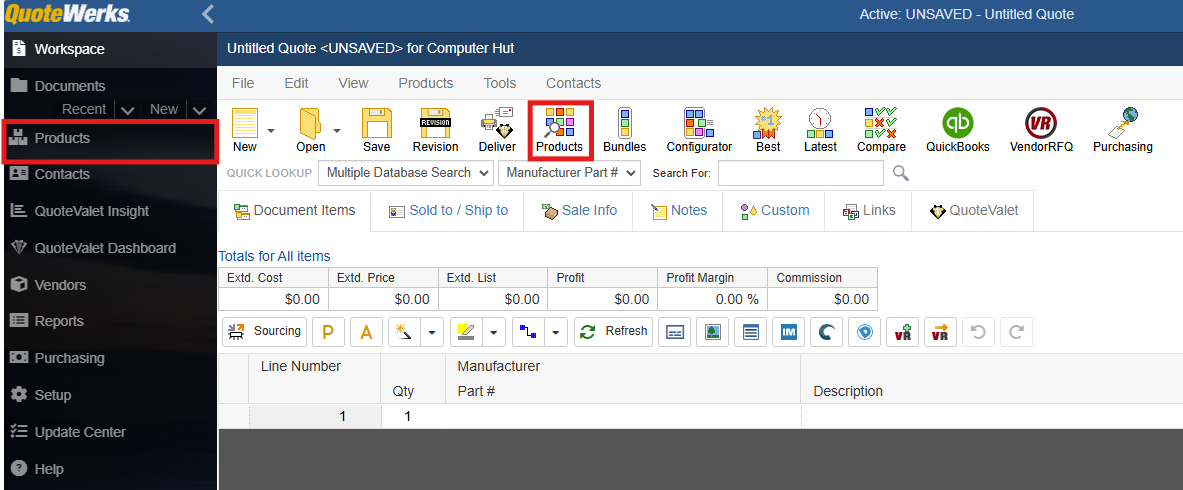
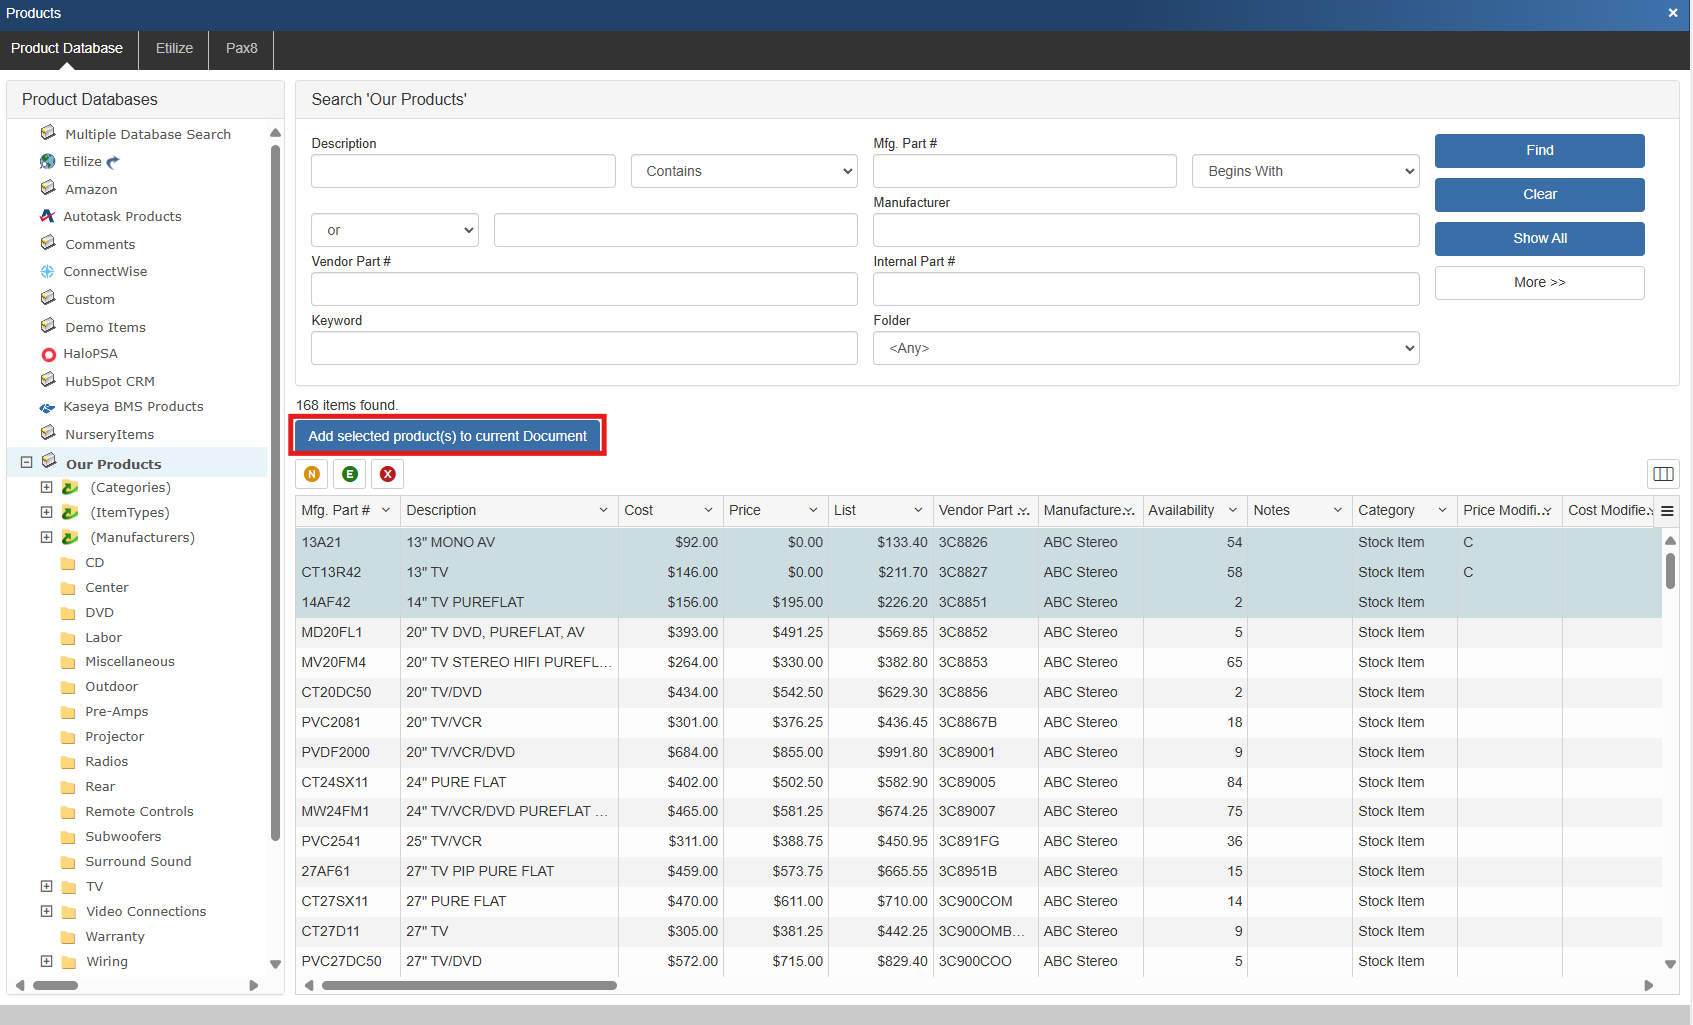
6. Now that we have our contact added, we can click back into the document items tab and start populating our quote with some products. To add products to your quote, click on the product icon or products on the left navigation panel. This opens the products window where you can search your configured product data sources.
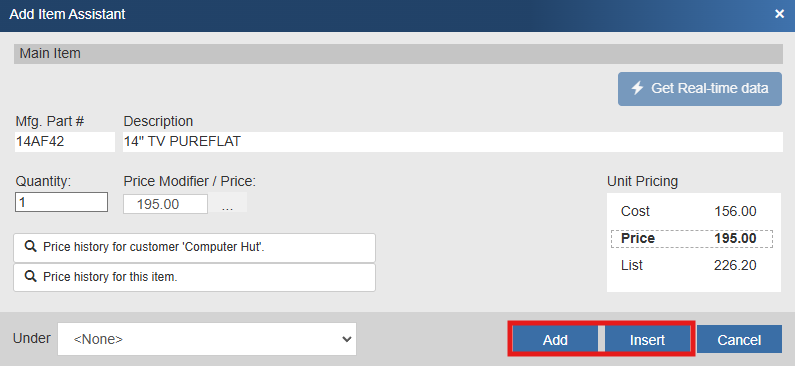
7. To add an item to the quote, simply double click on the item or select it and click on "Add selected products to current document." This opens the add item assistant window.
8. Here you can adjust the quantity to be included in the quote, set your pricing, or even check to see what you've sold this product for in the past. Clicking add or insert will add or insert the item to the quote respectively.
9. If we close out of the products window, you can see that our item(s) has been added to the quote.

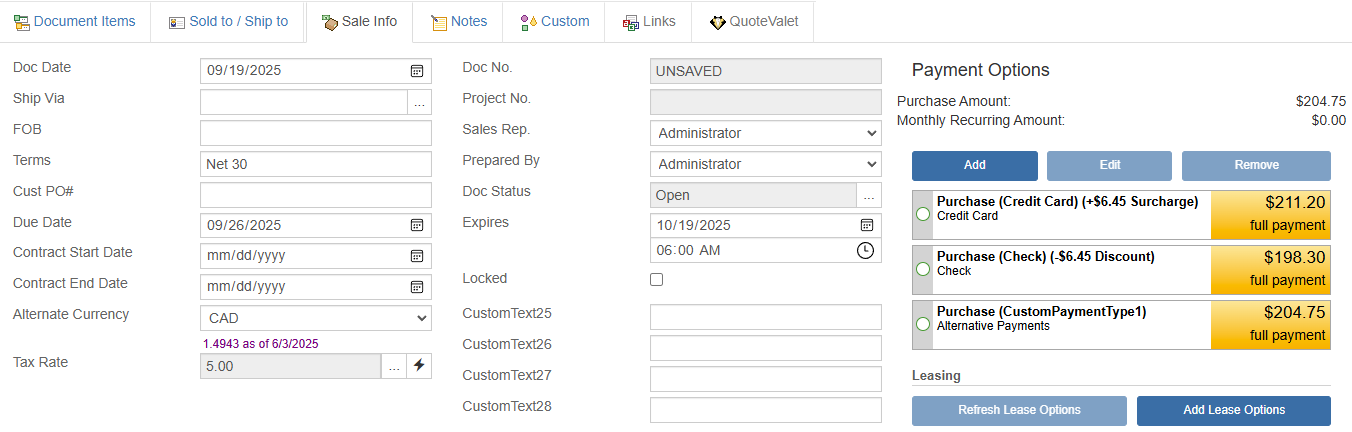
10. Now that we have our contact and product on the quote, we want to make sure that we configure other settings, and this is done on the sale info tab. Here we can set shipping method, terms, contract dates, tax rate, payment options, expiration date, and more.
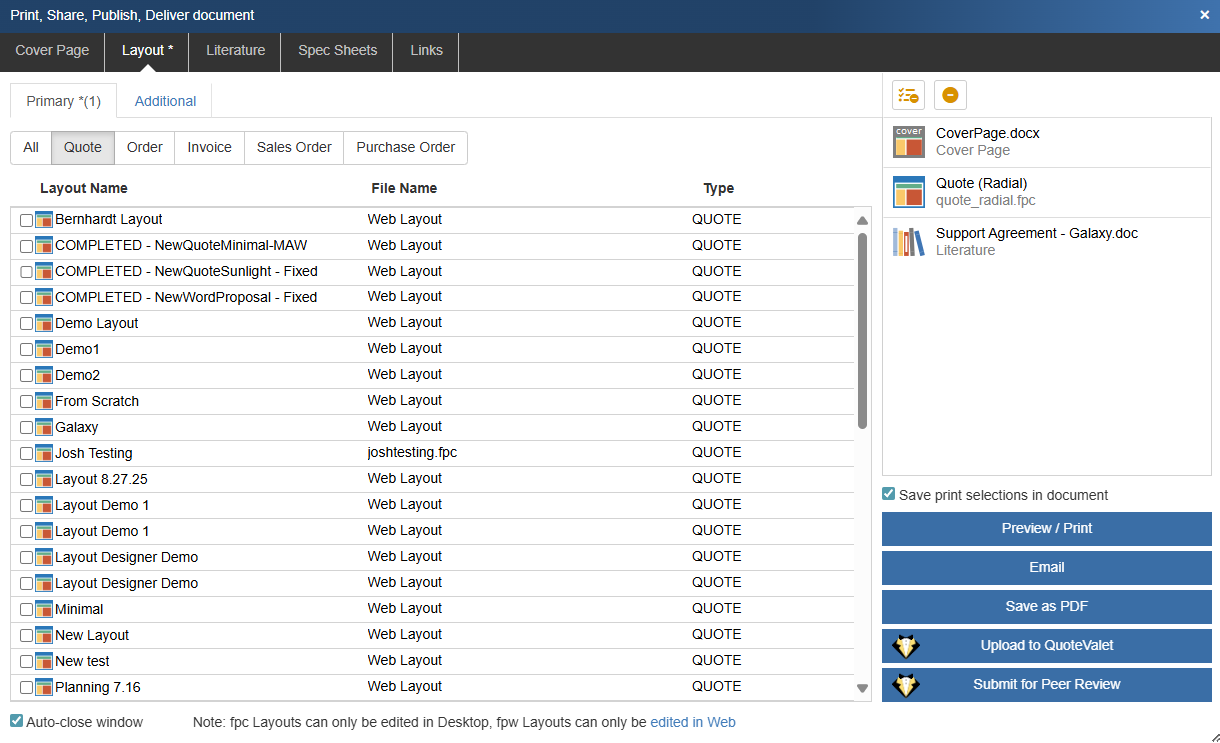
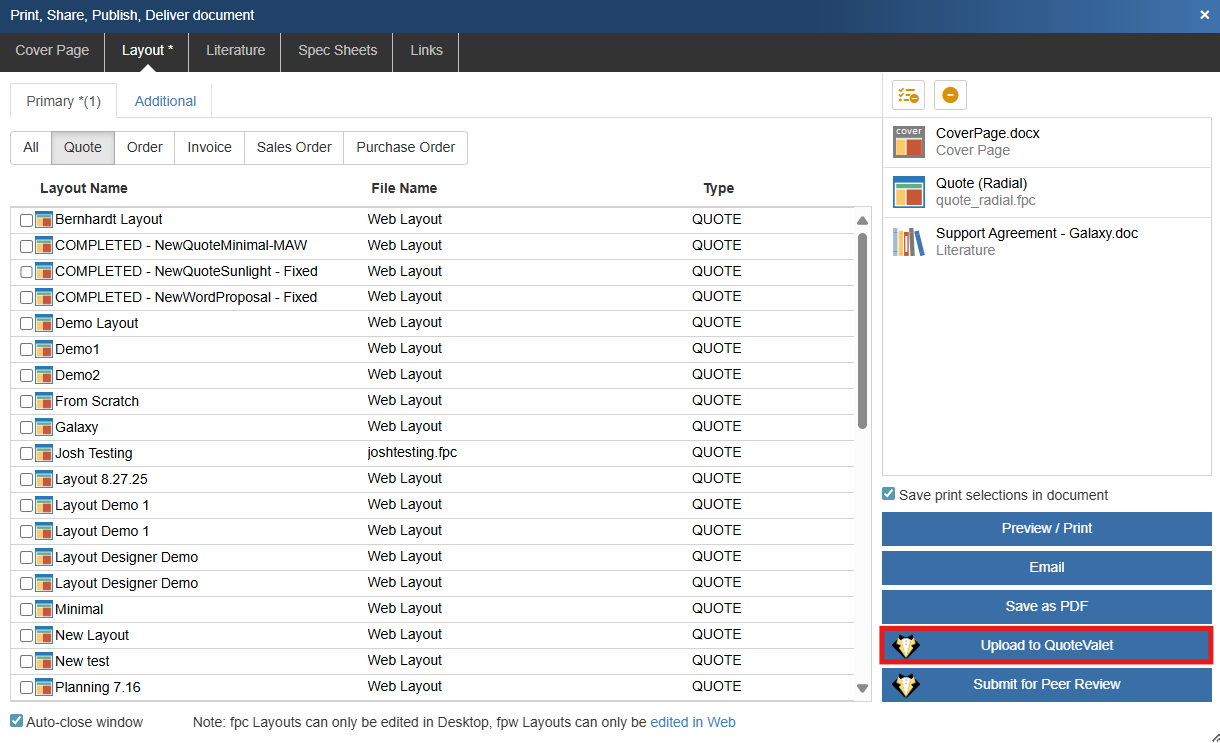
11. We are now ready to deliver this quote to the customer. To do so, click on the deliver icon. This opens the print, share, publish, deliver document window.

12. Here you can select your layout, cover page, literature, spec sheets, and links.
13. To deliver this quote through QuoteValet click on Upload to QuoteValet.
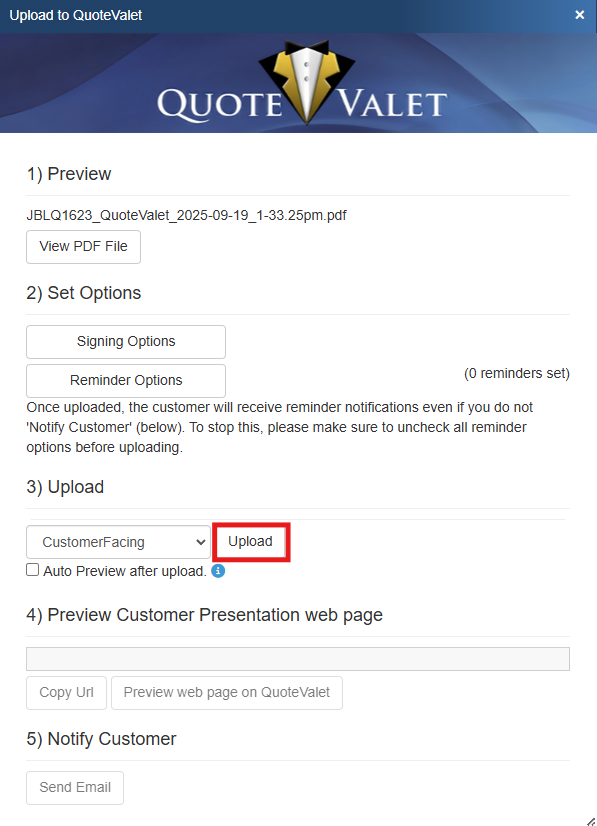
14. This opens the upload to QuoteValet window. Here you can preview the PDF attachment as well as set signing options and reminder options. To upload your quote to the QuoteValet server, click on upload.
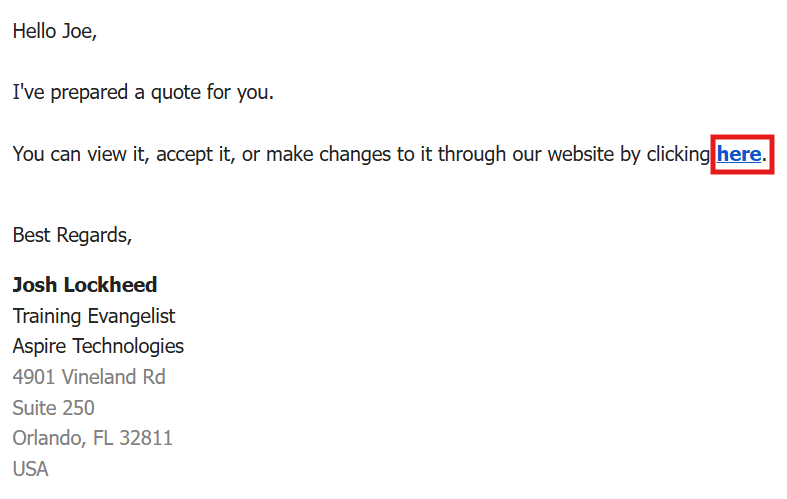
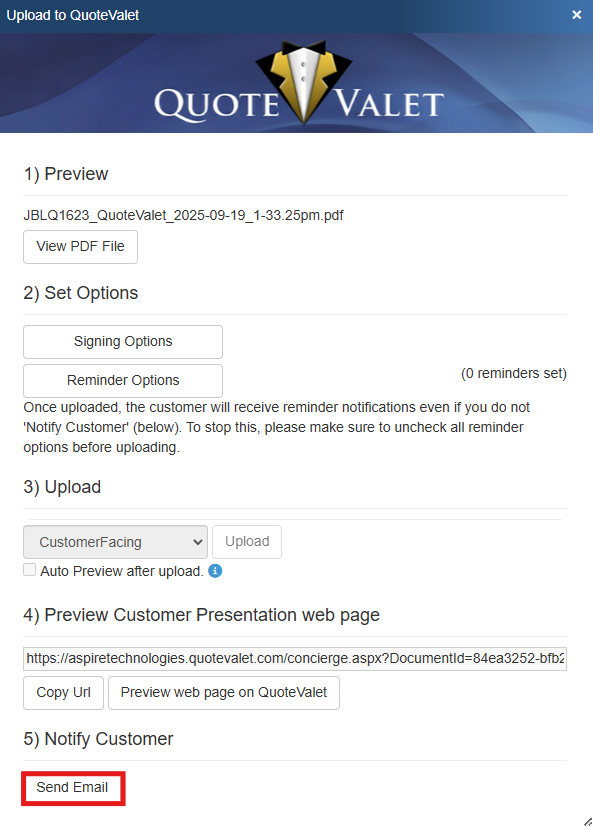
15. Once the quote has been uploaded, we can click on send email to send this to the customer from within QuoteWerks and without having to use an external email system. This email includes a link to the QuoteValet quote and is sent from the email of the sales rep preparing the quote.
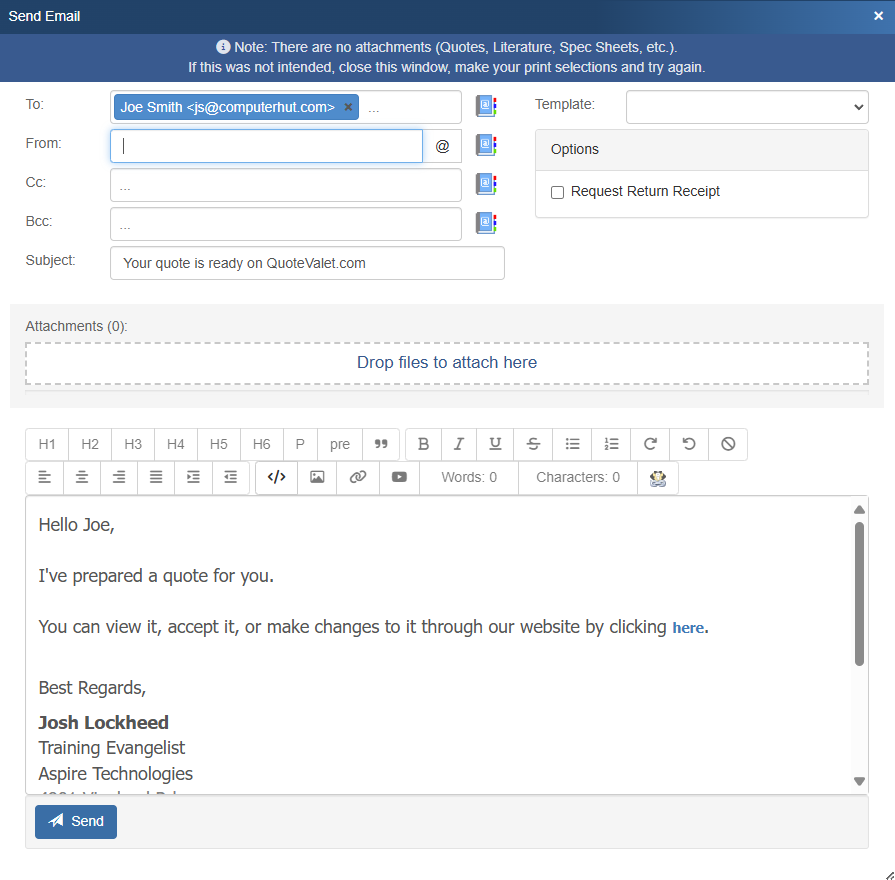
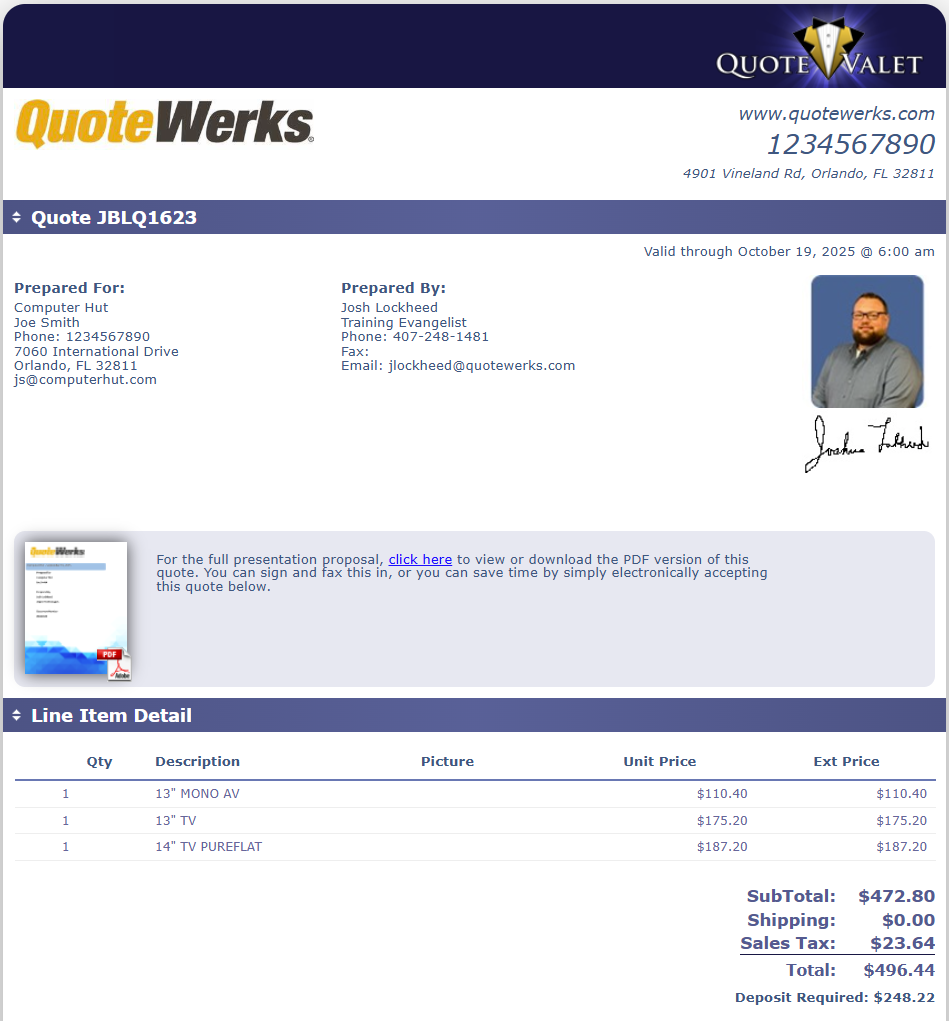
16. Once the customer receives the email, they can click on the QuoteValet link to open their interactive quote.