Tables can be configured on different levels:
•Table itself
•Table content
•Table header and footer element
•Individual table cell
One click on the table selects the table itself, double click into the table selects a table cell. Once a cell is selected only one click is needed to switch to other cells in the table. The whole content row, header or footer row can be selected by clicking the respective element in the menu panel on the left.
See below for different topics related to creating tables:
•Changing the Color of a Cell, Column, or Row
Tables are used to organize data in rows and columns. There are a number of settings that govern how a table displays.
Here are some of the settings that you can adjust to customize your table:
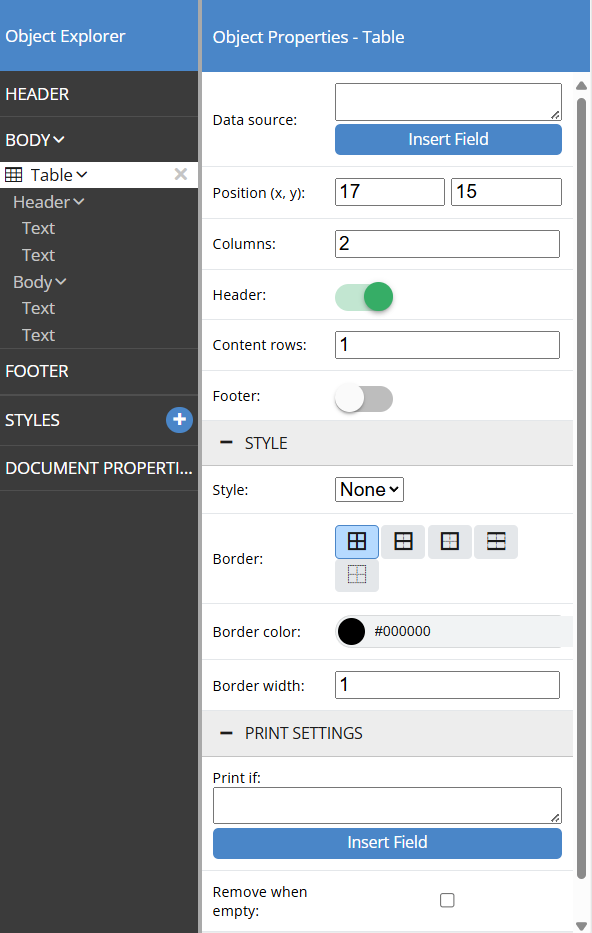
Data Source
Here you can click insert field to select the data source you would like to pull data from to populate the table. This will often be DI or the Document Items table.
Position
This controls where on the document the table is positioned. You can also adjust the position of the table by dragging and dropping it from within the layout editor.
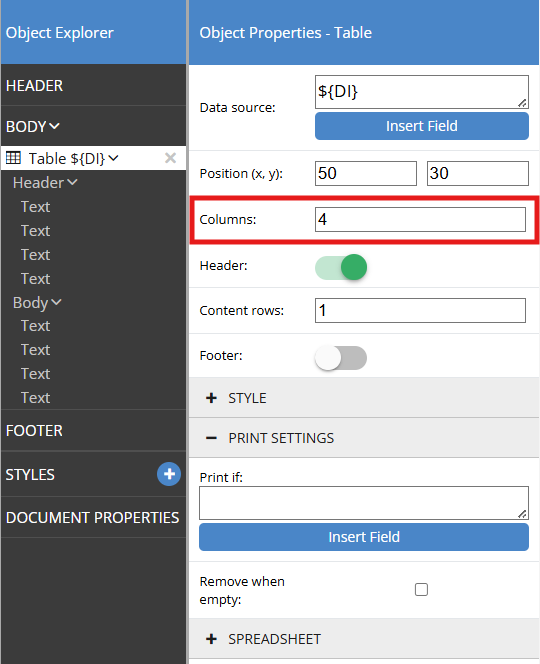
Columns
This controls the number of columns the table has.
Header
This is used to toggle on or off the header row of the table.
Content Rows
This controls the number of rows the table has, excluding the header and footer.
Footer
This is used to toggle on or off the footer row of the table.
Style
Here you can apply a saved style or apply a custom style to the table.
Print if
Print if is used to determine when to print the table. You can use expressions that call upon fields from the QuoteWerks system. For more information see Print if.
To insert a table into a layout simply click on the table icon and drag and drop it into the editor. This creates a table on the layout as well as objects in the object explorer. This also opens the object properties for the table as shown above.

Once you have created a table you can double click into any cell to open the cell object properties.
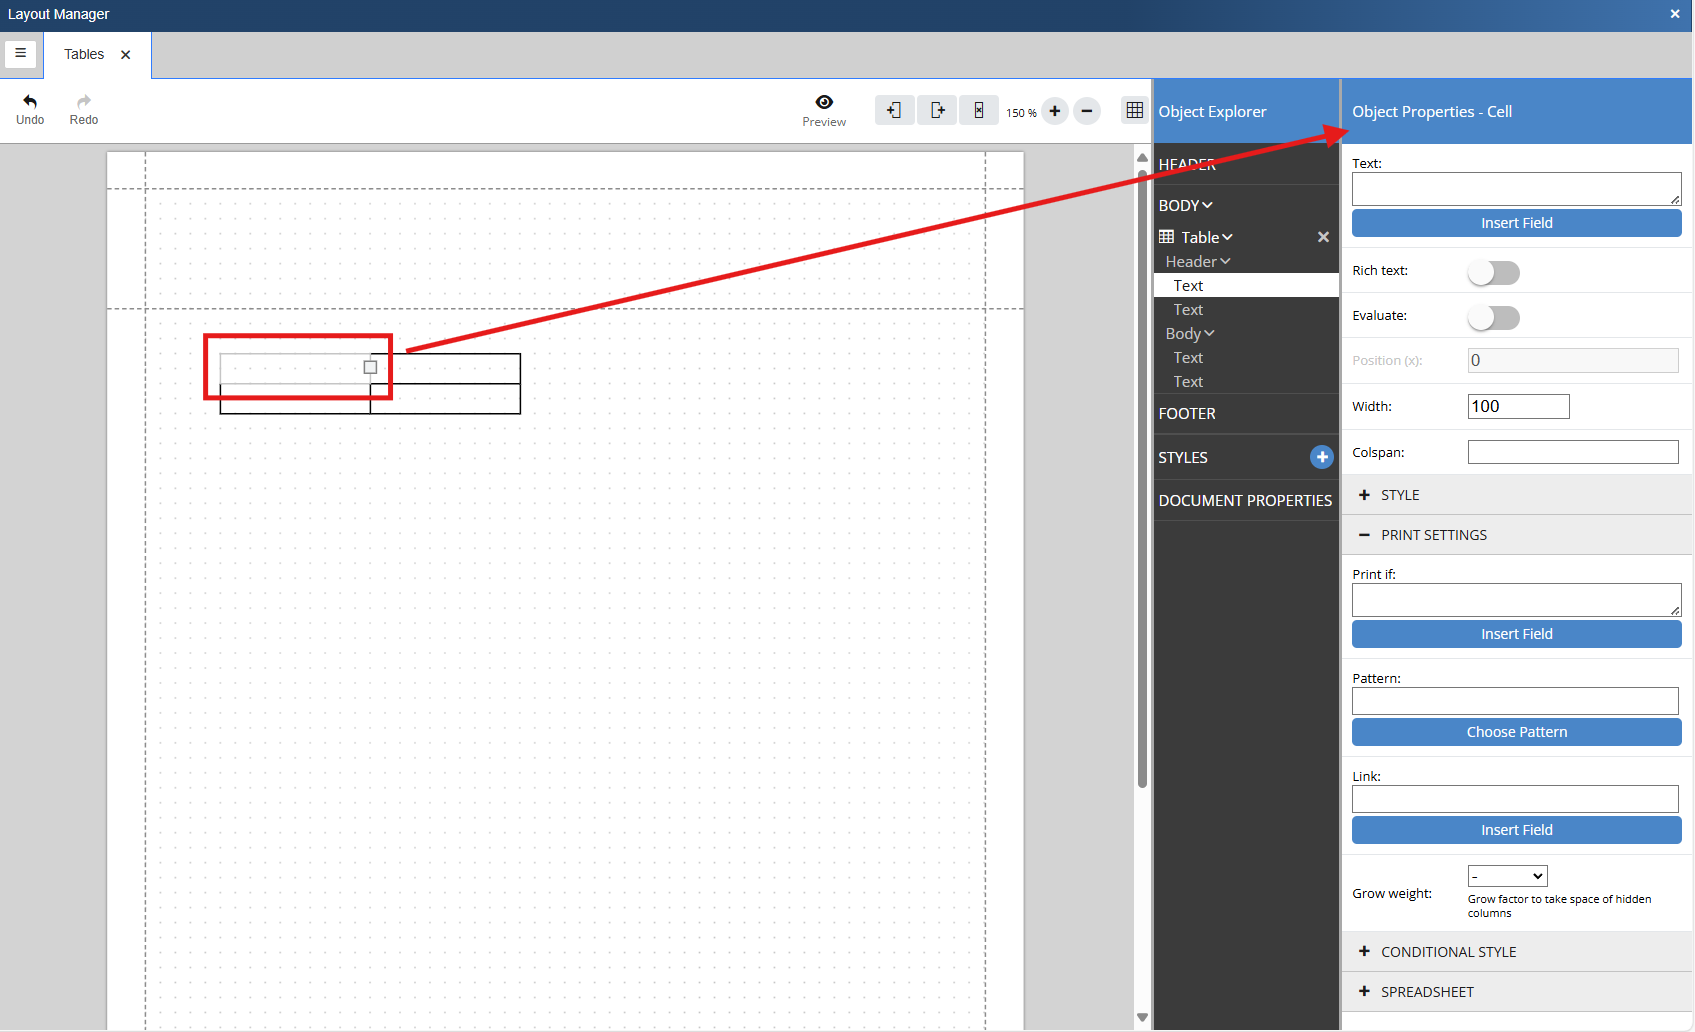
Data Source/Insert Field
Here you can either enter static text for data labels or pull dynamic fields from the QuoteWerks system. Different fields will be available depending on the data source you have selected for the table.
Rich Text
Clicking Rich Text will open a rich text editor where you can style the text you wish to include in the cell.
Evaluate
This button can be toggled on so that the cell's text can be evaluated as an expression.
Width
Here you can control the width of the selected cell.
Colspan
This option can be used to span cells across the table. For example, if you wanted a 4 column table to have a row that spanned the entire table you could set colspan to 4.
Print if
Print if is used to determine when to print the cell. You can use expressions that call upon fields from the QuoteWerks system. For more information see Print if.
To use a table to iterate through data from QuoteWerks you need to assign a data source to the table. This is done in the object properties.
1. Select the table.
2. Click on Insert Field below data source.
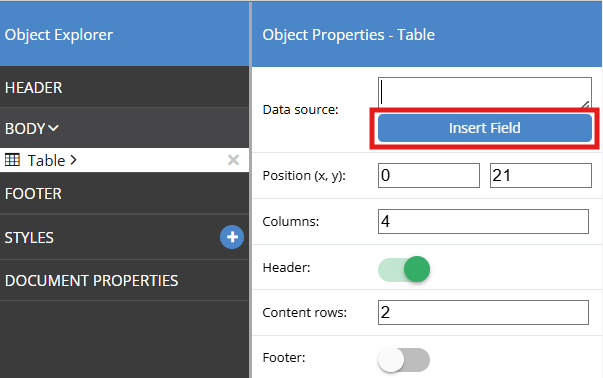
3. Search for the data source you would like to use and select it.
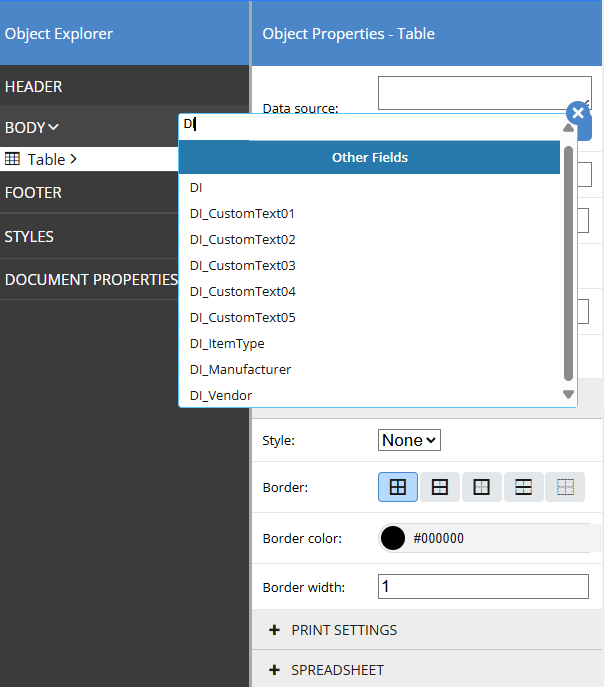
With the data source selected you can now call upon data fields from that data source in the table.
To add a column to an existing table first select the table by clicking on it. This will open the table object properties. In the columns field insert the number of columns you want the table to have. For example, if the table currently has 3 columns and you want to add a forth, simply adjust that columns value to 4 as seen below.
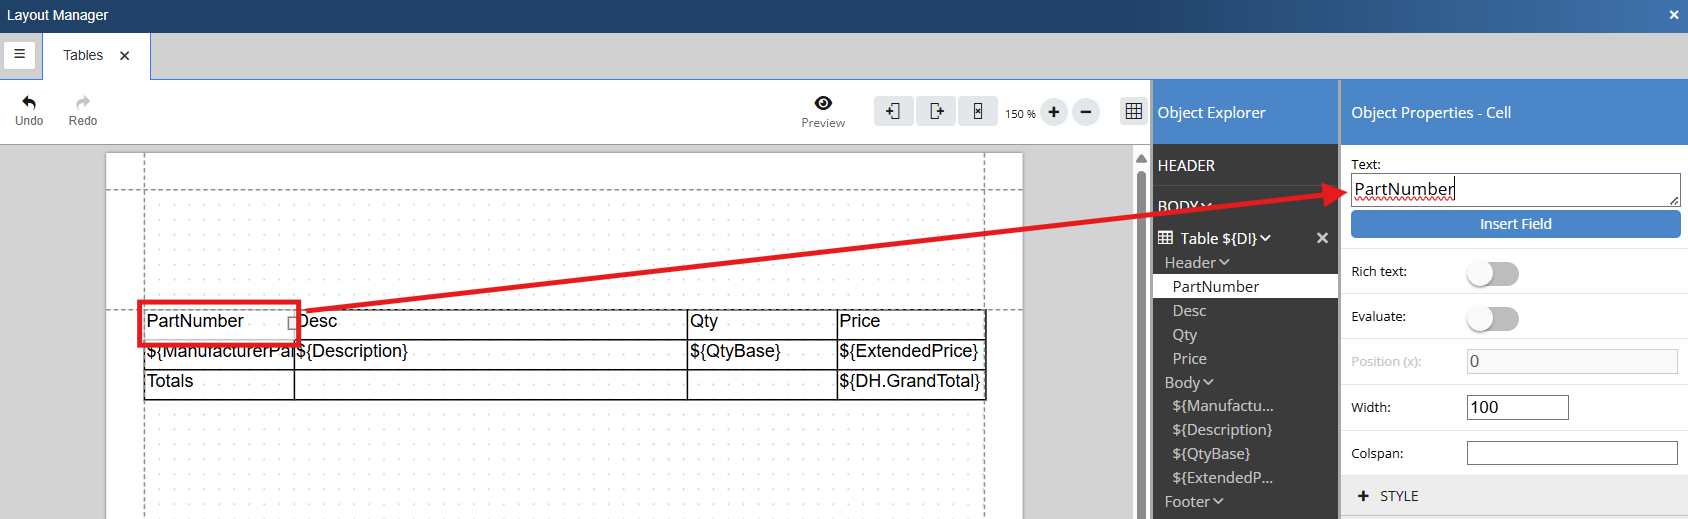
There may be instances where an existing column needs to be re-purposed for another use and the column header label needs to be changed. To do so, simply double click into the cell you wish to change. Then, under object properties you can adjust the text in the Text field to reflect the new name.
Changing the Color of a Cell, Column, or Row
Users can change the background color of any cell column or row.
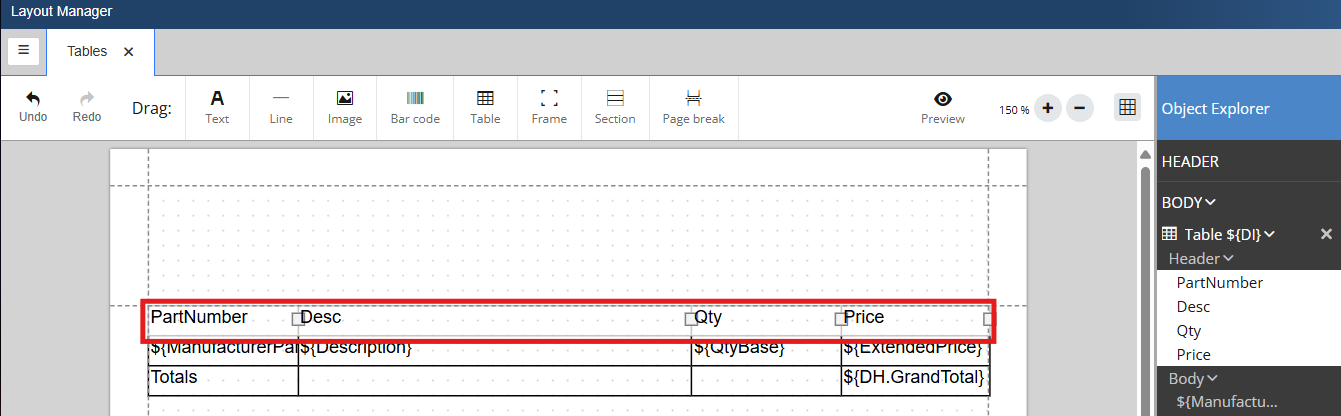
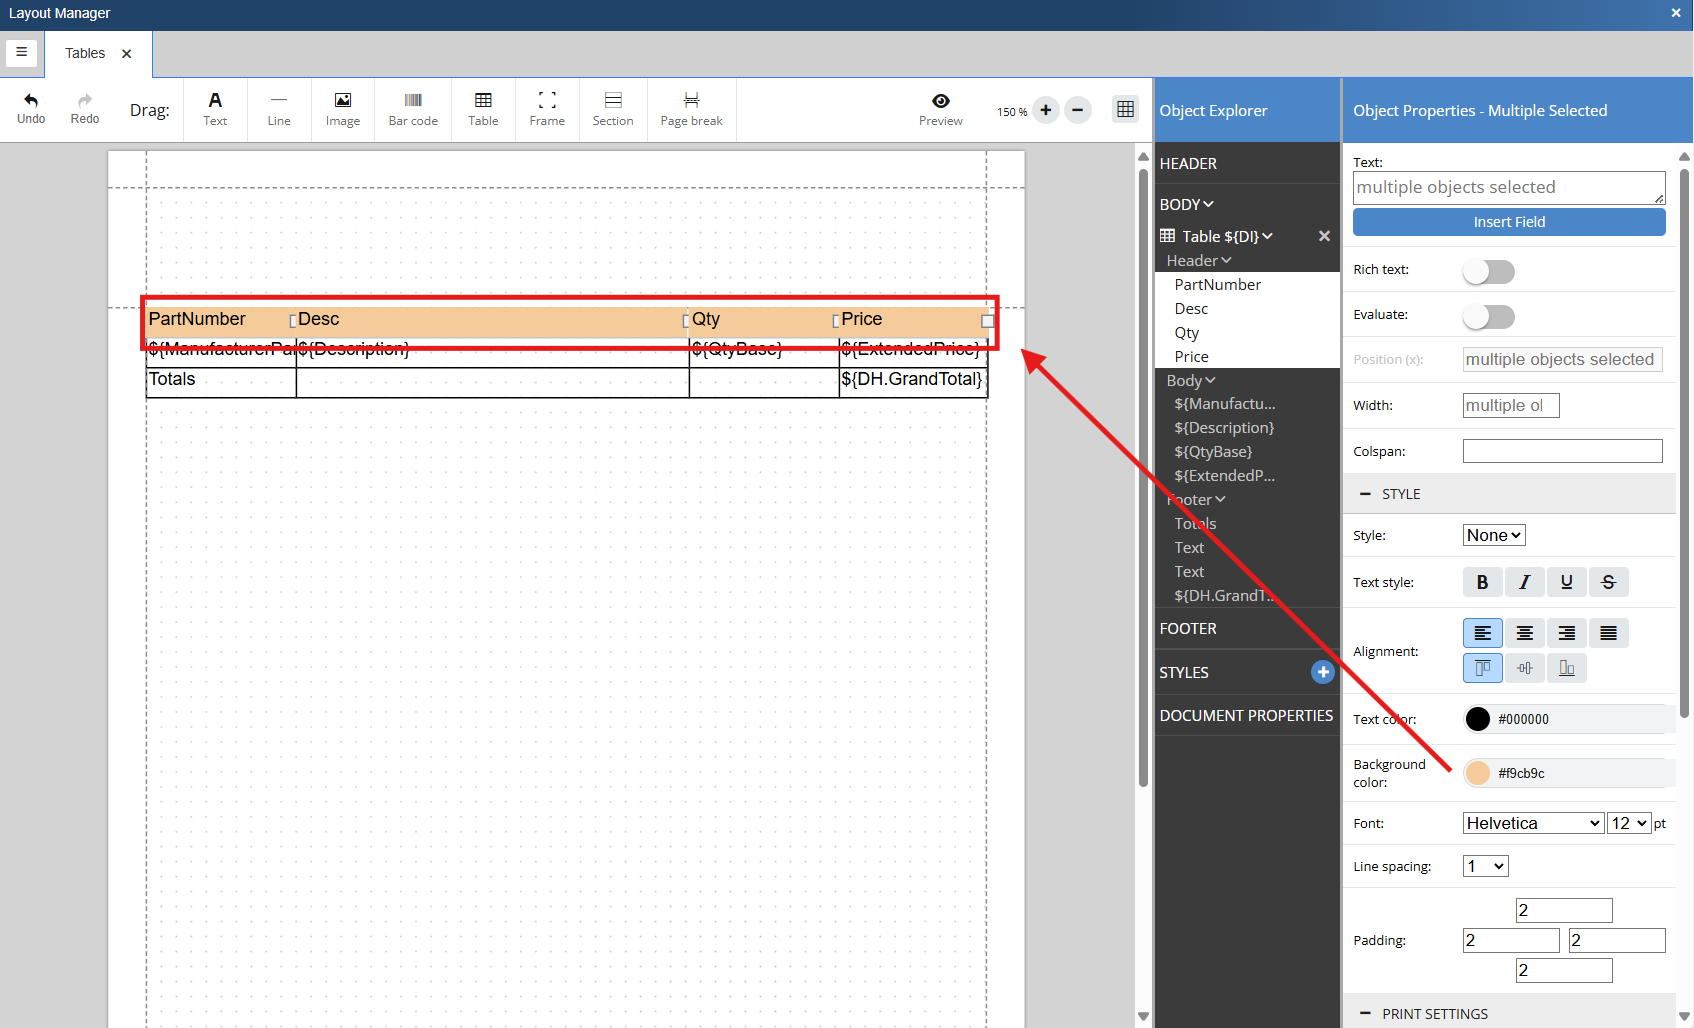
1. Select the cell you would like to change the background color of by double clicking into it. If you would like to change multiple, select them while holding the shift key. In the example below all cells in the first row have been selected.
2. With the cells selected you can change the background color by opening the style section of the object properties and changing the background color to reflect the new color.
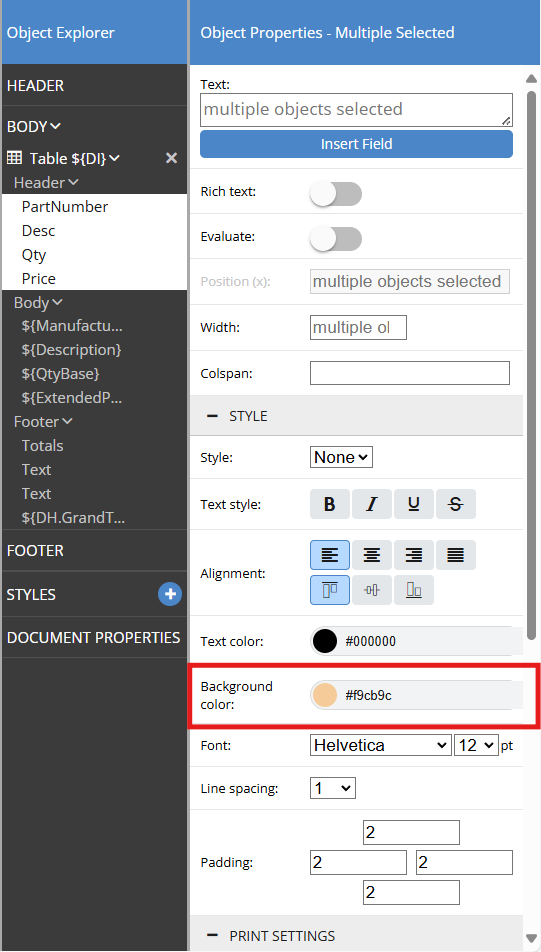
3. The background color of the selected cells will update with the new background color:
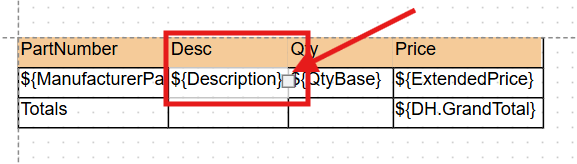
When creating a table users may want to adjust the size of a cell to accommodate text or data fields.
1. Double click into the cell you would like to re-size. A handle will appear on the right side of the cell.
2. Click on the handle and drag it to the right until the desired size has been achieved.
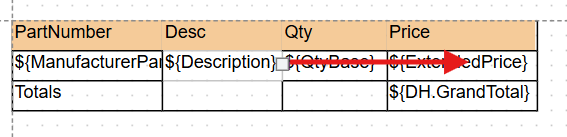

3. When the desired size has been achieved simply click out of the cell and the sizing will persist.